
Where you set up the till itself. Selling happens in the till app, which runs on the cashier's device — a tablet, a laptop, a phone. This page creates the till, connects the device to it, cashes it up at the end of the day, and configures the card reader.
1. Create a till
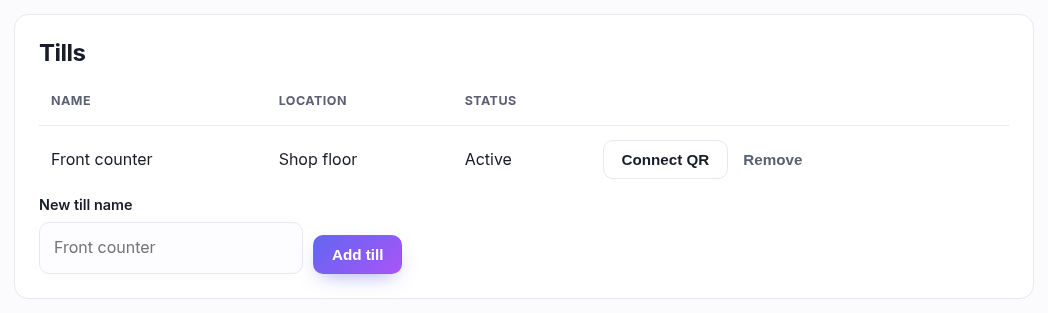
Type a name into New till name and press Add till. Name it after where it physically stands — "Front counter", "Events desk" — because that name appears on every cash-up and Z-report you'll ever read back. Add one till per place money is taken; two people serving from the same counter can share one.
2. Connect the device
Press Connect QR and scan the code on the device that will be the till. The code is only valid for 3 minutes — if it expires, just press the button again.
Scanning signs that device into a restricted till session. It can sell, take payment and open the drawer; it cannot reach your admin, your reports or your settings. That's deliberate: a tablet left on the counter is a till, not a way into your business.
3. Cashing up (the Z-report)
While a till has a session open, it appears under Open sessions. At the end of the day, count the cash drawer, type the total into Counted cash, and press Close (Z).
The count is blind — you tell it what's in the drawer before it tells you what it expected. That's the point: it's a check, and a check you can see the answer to isn't one. The Z-report that comes back shows sales, cash vs card, the opening float, expected versus counted, and the variance between them. Every past session is kept — see Reports ▸ Till sessions.
4. Card payments
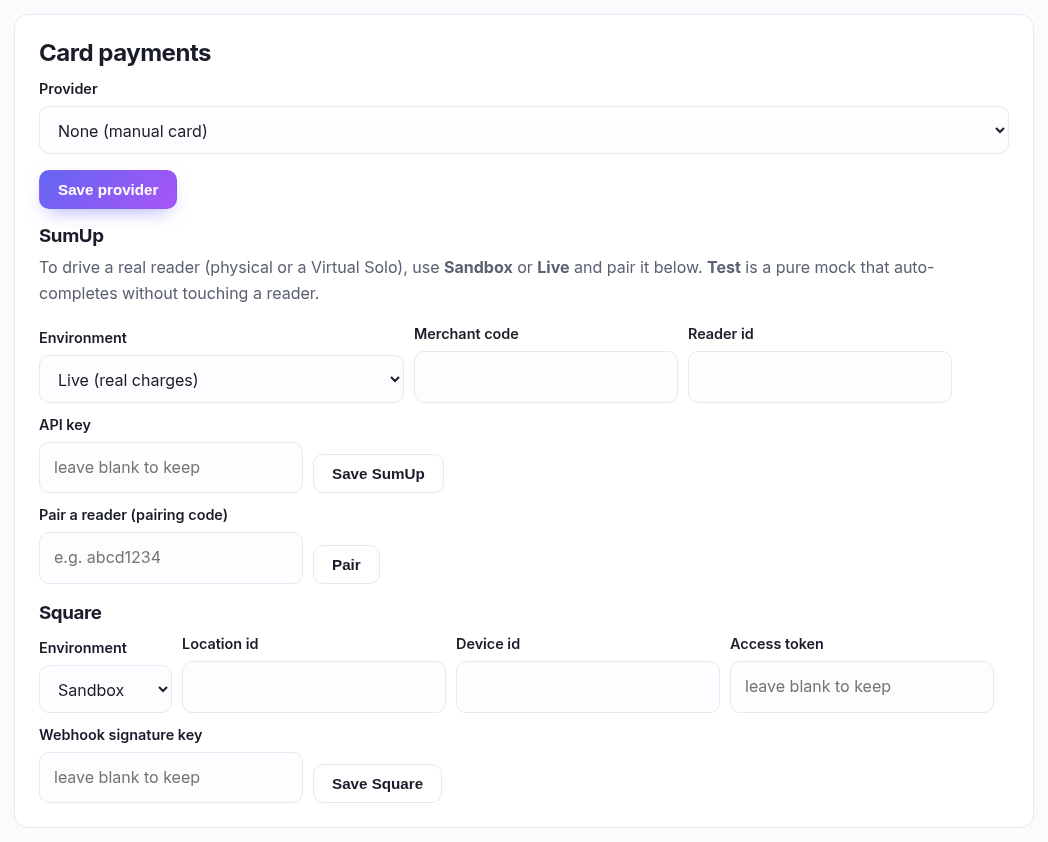
Pick a Provider, then fill in that provider's details below and save.
| Provider | When to pick it |
|---|---|
| None (manual card) | You have a card machine that isn't connected to the till. The till records the sale as paid by card; you take the payment on your own terminal. Perfectly valid. |
| SumUp | The till drives a SumUp reader directly — the amount is pushed to the reader, no re-typing and no mis-keyed totals. |
| Square | The same, with a Square terminal. |
Environments — read this before you go live
- Live / Production — real cards, real money. This is what you run day to day.
- Sandbox — a real reader, real taps, no real money. The right way to rehearse.
- Test — a pure mock. No reader is involved at all; payments auto-complete instantly. Useful for training staff on the till flow, useless for testing the hardware.
Filling in SumUp
Merchant code and API key come from your SumUp dashboard; Reader id identifies the physical reader. If you don't know the reader id yet, save the rest first, then use Pair a reader with the pairing code the reader displays. Leave the API key blank when editing later and the saved one is kept — it's never shown back to you, only its last four characters.
Filling in Square
Location id and Device id come from your Square dashboard; Access token and Webhook signature key are secrets and behave the same way — blank means "keep what's saved". The webhook key is what lets Square tell your till a payment completed, so a sale finalises by itself rather than the cashier waiting.
VAT — which case are you?
- If you are VAT registered (a VAT number is saved in Settings ▸ Store details): till prices are treated as VAT-inclusive exactly like online prices, and the VAT inside each sale is broken out on the VAT report alongside your web orders. One return covers both.
- If you are not VAT registered: no VAT is charged or recorded at the till, and it shows as zero. That's correct, not a fault.
Good to know
- Remove deletes a till. Its past sessions and Z-reports are kept.
- A till with a session open says session open in the Status column — that's your cue that someone hasn't cashed up.
- Stock sold at the till comes off the same stock as the website. Sell your last copy on the counter and the web page stops offering it.